Installation and setup of the WHMCS module for selling VPS on an hourly basis
Step 1 of installing the module in cPanel
-
First, go to the modules folder in the cPanel control panel and click on Upload as shown in the image below
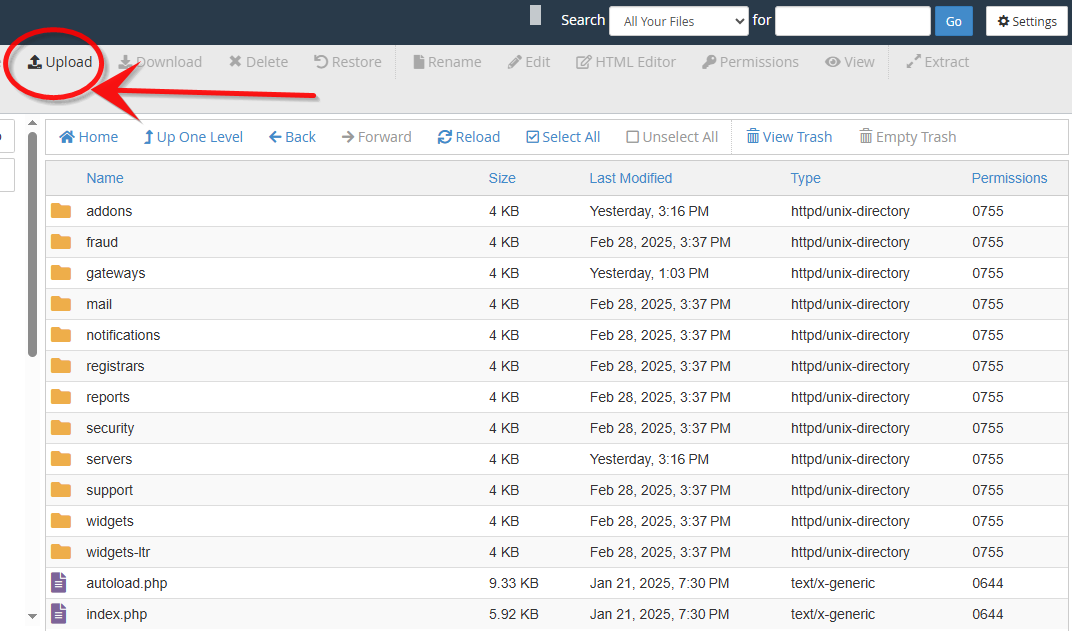
In the module folder, upload the module file
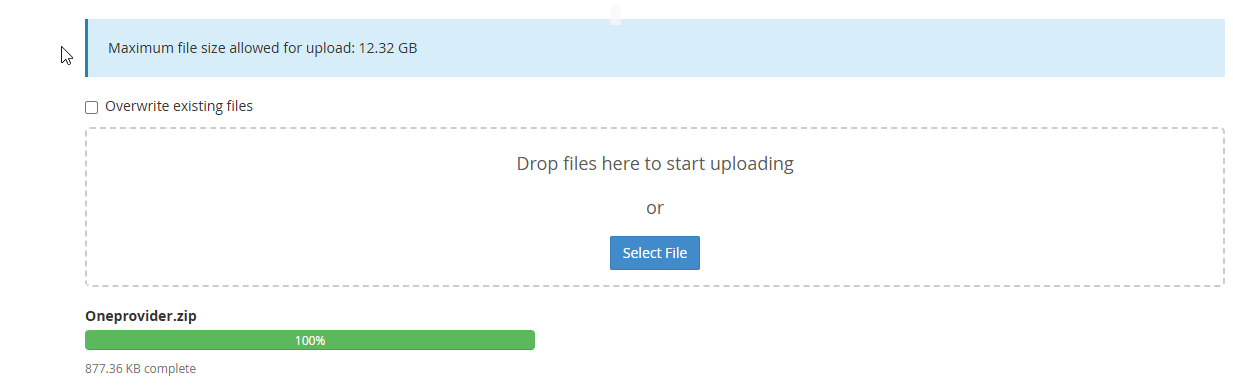
Extract the relevant file (right-click and then click on Extract)

Now go to WHMCS settings:
System Settings > Addons.
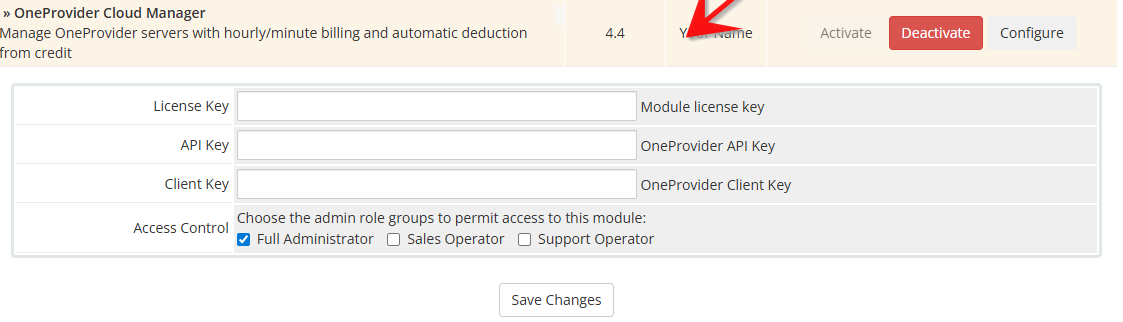
Activate the module and enter the following in its fields: License Key, API Key, Client Key.
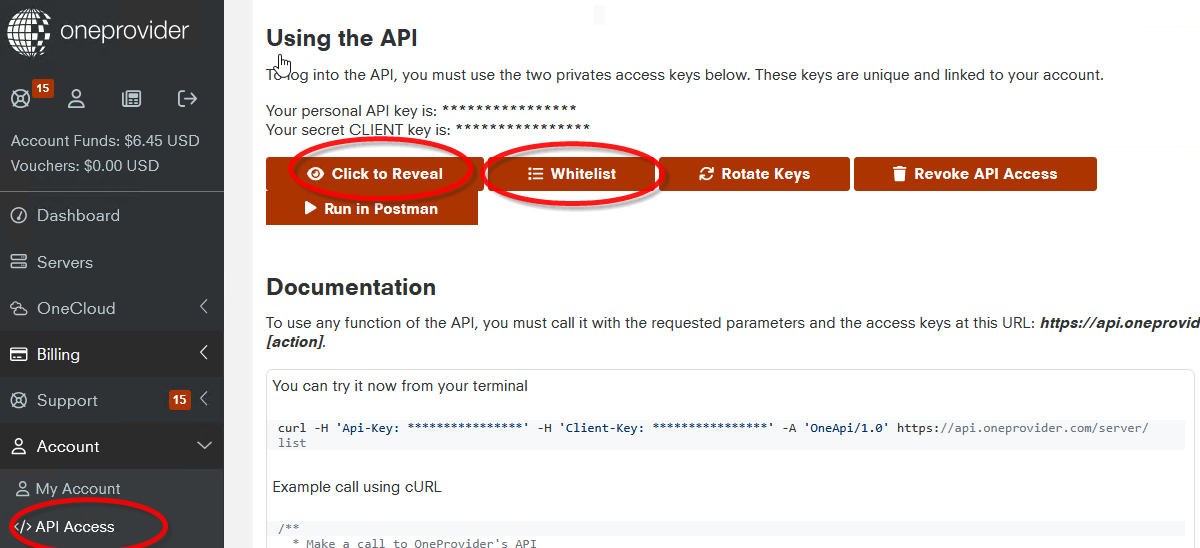
In the next step, go to oneprovider.com, and from the API Key section, obtain the API Key and Client Key. Please note that you must add your host's IP to the whitelist to establish API communication
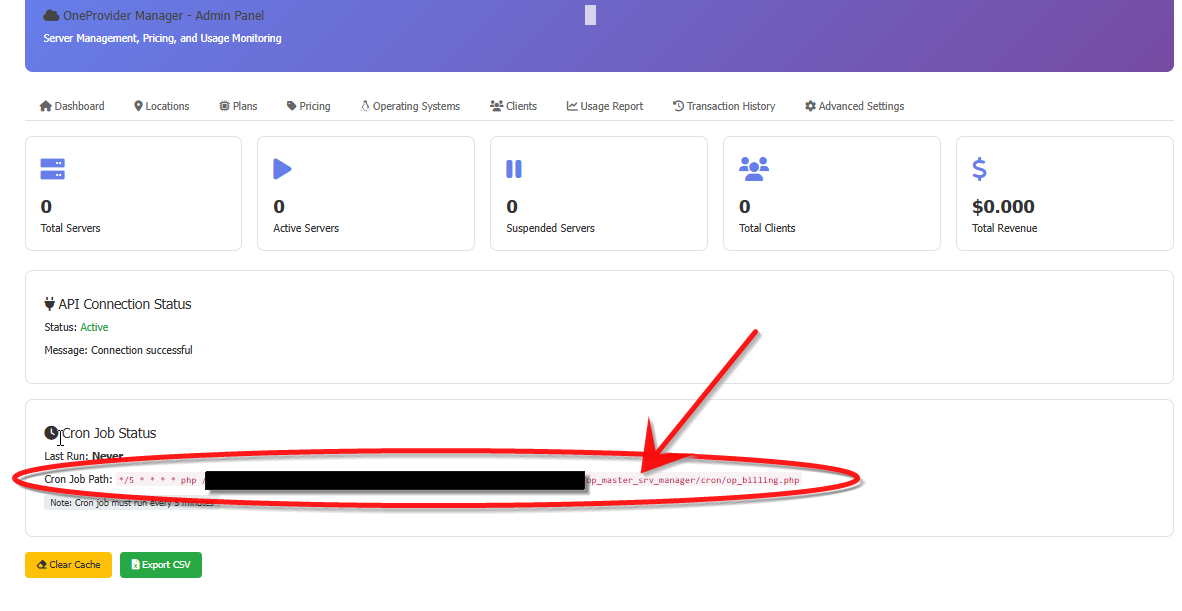
After activating the module, the management settings will appear as shown in the image below. From the Cron Job Status section, you will see the cron job address. This address must be entered in your hosting's cron job settings
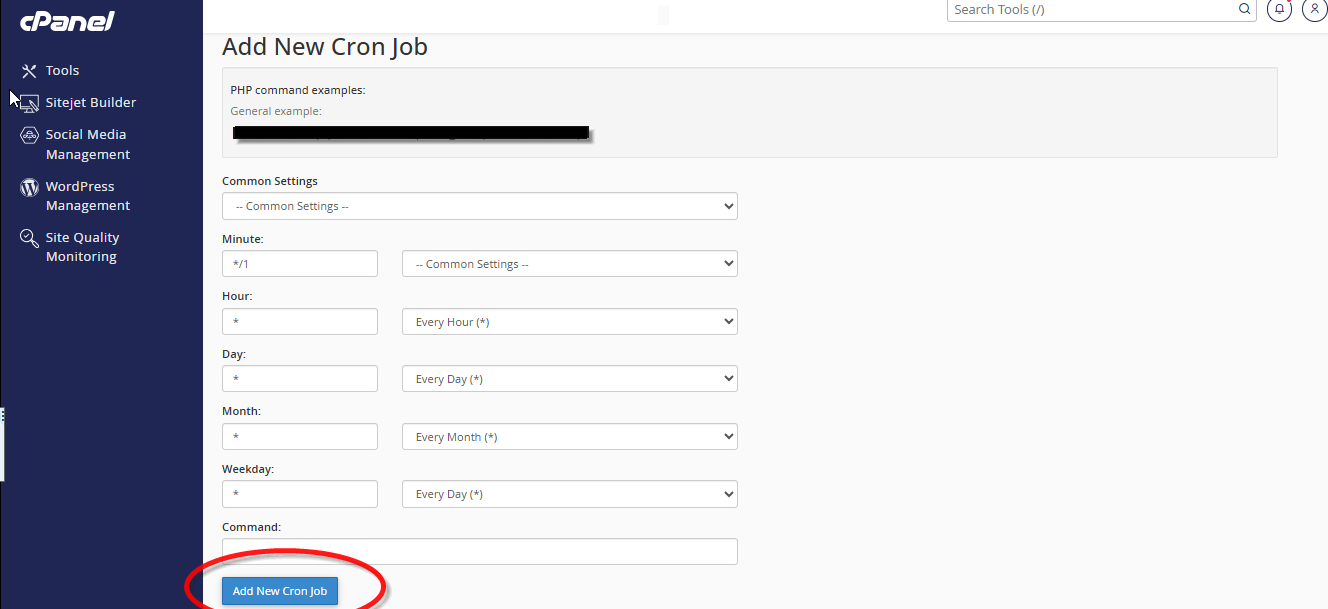
Go to the cron job section in cPanel and configure the settings as shown in the image below. It is better to set the schedule to 5 minutes so that the cron job executes the commands every five minutes. In the image below, the cron job is set to one minute
Step 2 OneProvider Manager - Admin Panel:
At this stage, the module installation configuration is complete. As shown in the image below, the module has various settings, including Locations, Plans, Pricing, Operating Systems, Clients, Usage Report, Transaction History, and Advanced Settings.
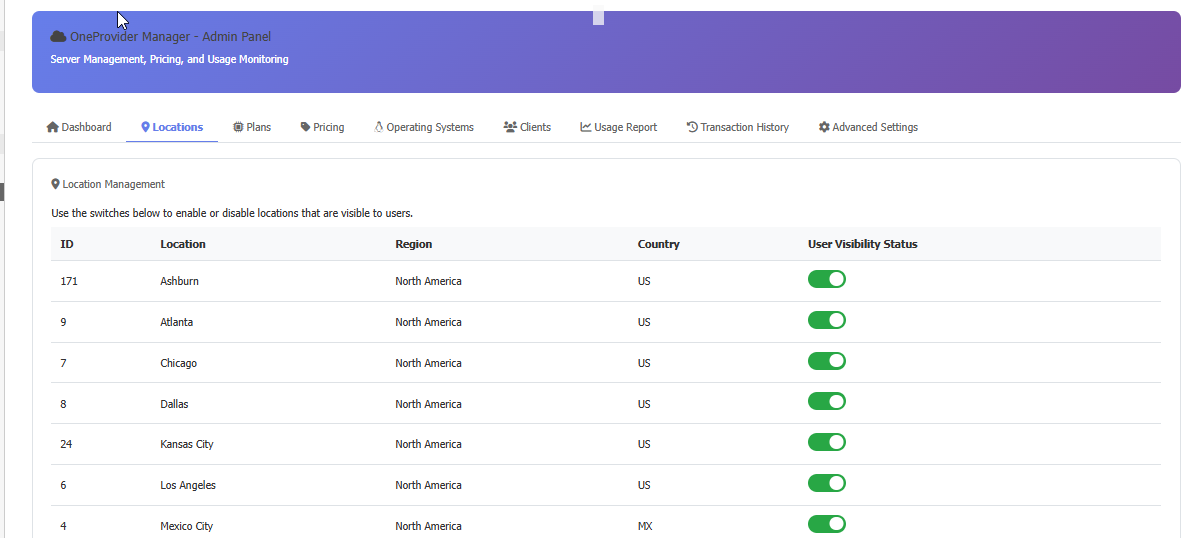
Locations:
In the Location section, you will be able to view all active locations in the Oneprovider data center. Then you can activate or deactivate each one.
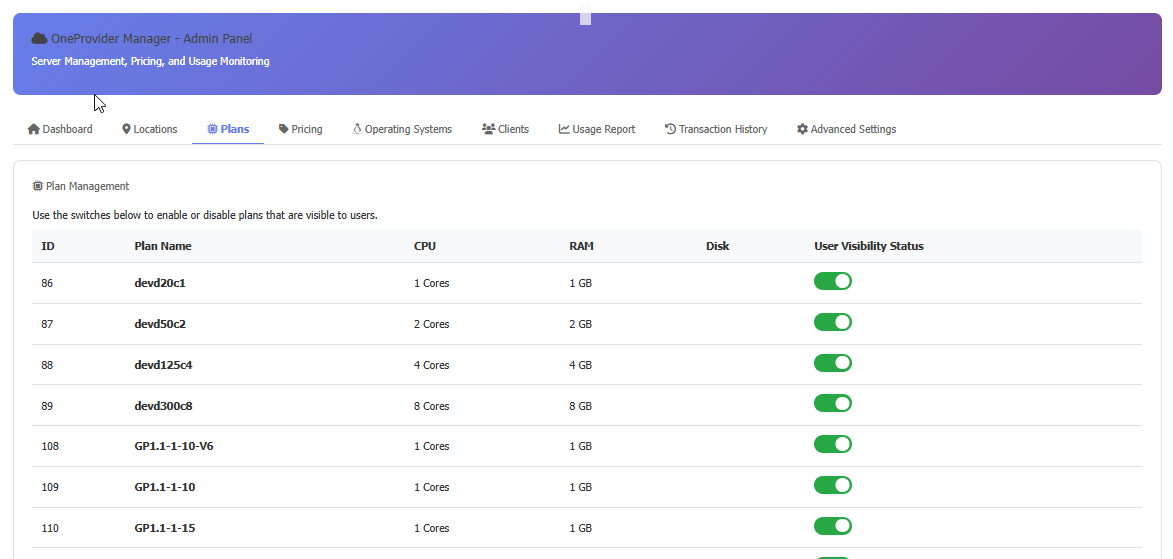
Plans:
In this section, you can view all available plans of the Oneprovider cloud service, and you have the ability to activate or deactivate each one. (If any plan is activated in this section, the corresponding plan will be activated simultaneously in the Pricing section as well.)
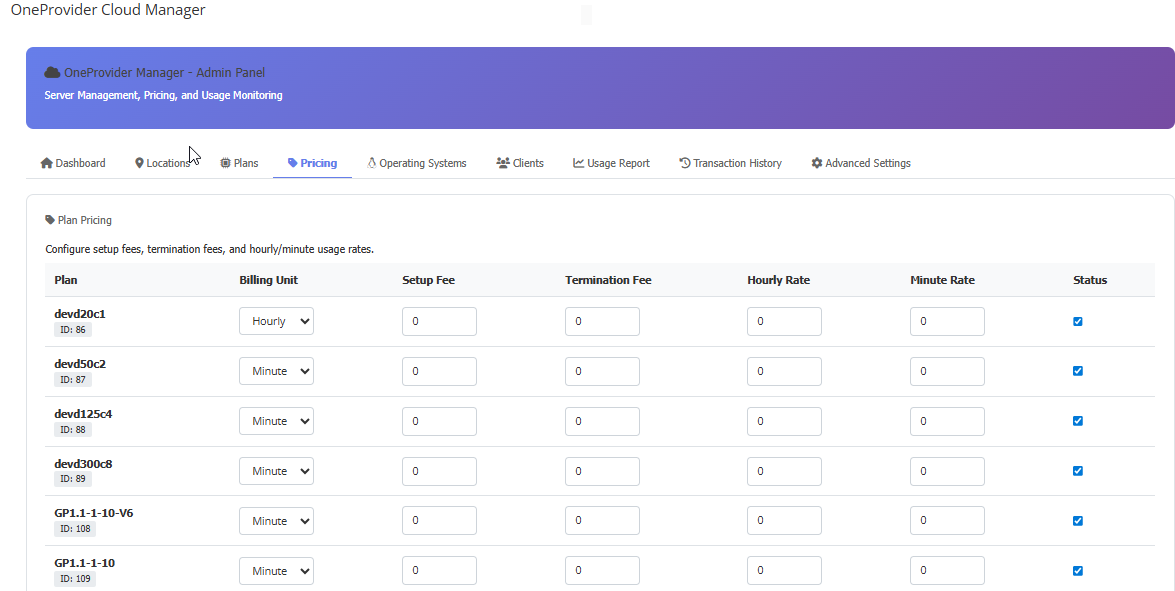
Pricing:
In the Pricing section, you can view all plans, and the price of each plan can be set separately on an hourly or minute basis. Additionally, in this section, you can configure pricing for server creation or server deletion. That is, if you wish for a fee to be deducted from the customer's credit each time a server is created or deleted, this feature can be adjusted here. It is also recommended to set the billing to hourly so that the server cost is deducted on an hourly basis. If you intend to test a plan, you can set it to minute‑based billing and test the desired product
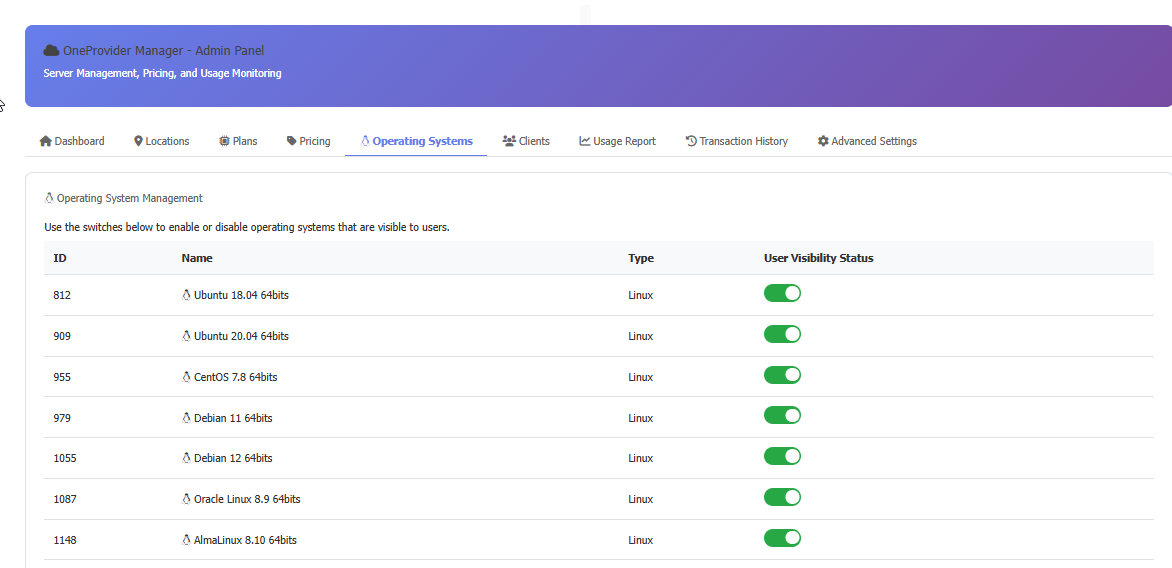
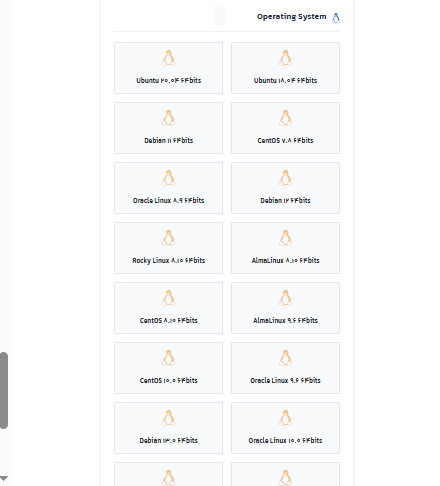
Operating System Management:
In the Operating System Management section, you can activate or deactivate all Linux distributions available in the Oneprovider cloud panel
Client:
In the Client section, you can view customer details as well as all your customers, and manage the amount of credit available in their accounts
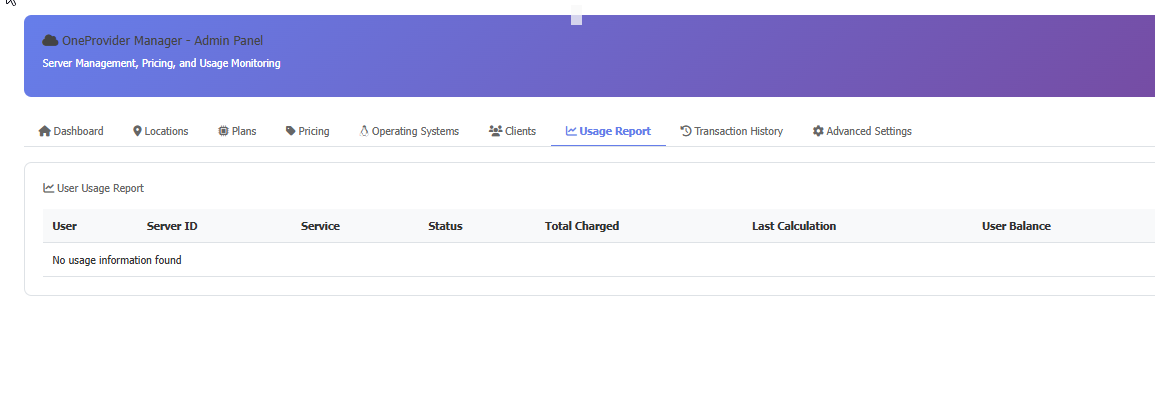
Usage Report section:
In the User Usage Report section, the report of customer charges/costs is visible
Transaction History:
In the Transaction History section, you can view the history of customer credit deductions along with the product, customer ID, available credit, and the amount of credit deducted.
Advanced Settings:
One of the important sections in the module settings is Advanced Settings. In this section, you can configure settings such as Minimum Balance, Warning Balance Threshold, Termination Grace Period, Automatic Settings, History Cleanup Settings, Order Auto-Activation Settings, as well as test and configure warning emails for credit balance decrease in the customer's account.
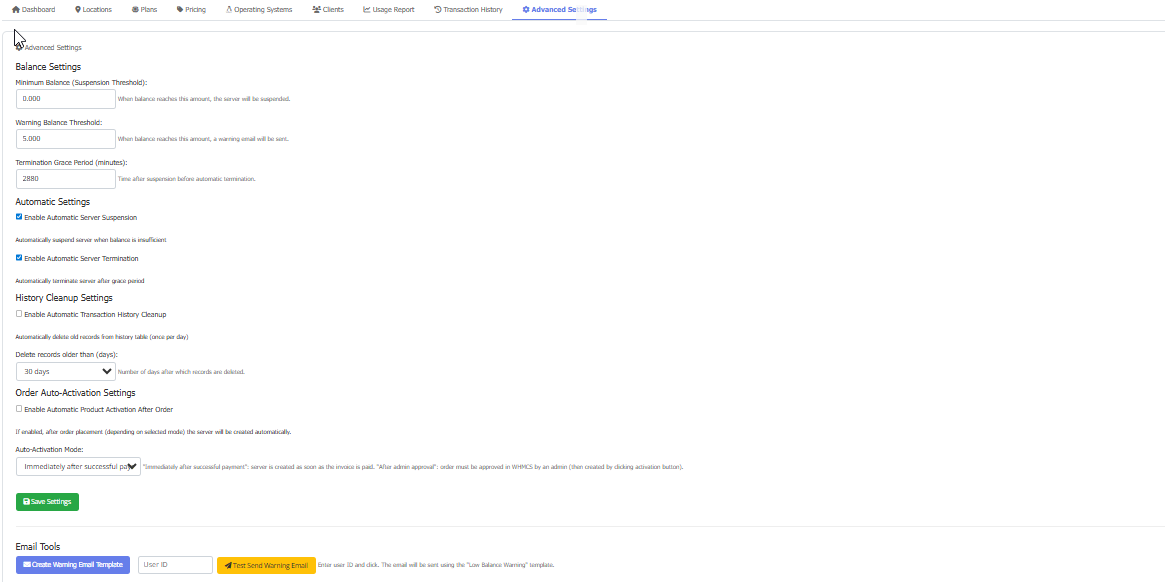
Minimum Balance (Suspension Threshold): Sets the minimum credit amount for the user. If the user's credit falls below this amount, they cannot create a server.
Warning Balance Threshold: The minimum credit amount at which, upon reaching this value, a warning email is sent to the user and the user is informed that their credit has reached the warning threshold.
Termination Grace Period (minutes): This is the time after which the customer's service is deleted following the server being suspended due to insufficient credit. If this time is set to zero, the server will be deleted immediately after the user's credit runs out.
Enable Automatic Server Suspension: If this option is enabled, the server will be suspended after the credit runs out or reaches the minimum balance, and it will not be possible to manage it again until the user's account is recharged.
Enable Automatic Server Termination: If this option is enabled, the server will be deleted after reaching the minimum credit and the time set in the Termination Grace Period has passed. Please note that if this option is disabled, the server will not be deleted even if the time settings in the Termination Grace Period are configured
Enable Automatic Transaction History Cleanup: If this option is enabled, transaction history will be automatically deleted after the number of days set in 'Number of days after which records are deleted'. (It is recommended to set 'Number of days after which records are deleted' to one day.)
Email Tools: In this section, you can enter the customer ID and test sending an email for credit decrease.
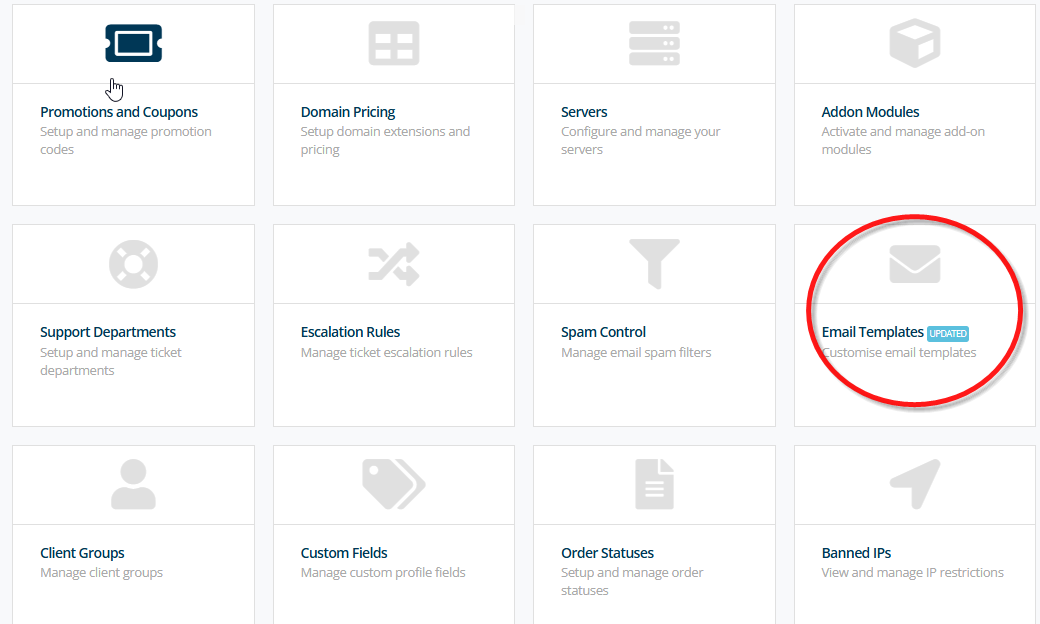
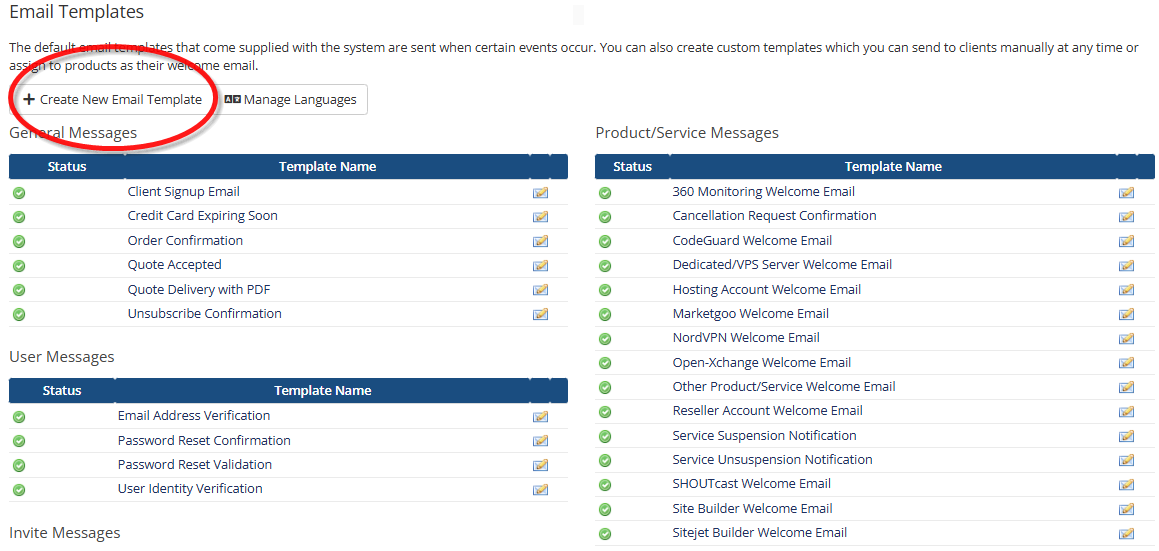
It is better to manually configure the warning email template settings. After going to the Email Templates settings section (System Settings > Email Templates), click on Create New Email Template, then enter the phrase 'Low Balance Warning' as the Unique Name. After saving the email template, set the unique email name according to the standard below:
Dear {$client_name},
Your current balance is {$client_balance}.
This amount has reached the warning threshold of {$warning_threshold}.
If your balance falls below {$min_balance}, your servers will be suspended automatically.
Please recharge your account to avoid interruption.
Regards,
Support Team"
Email Templates
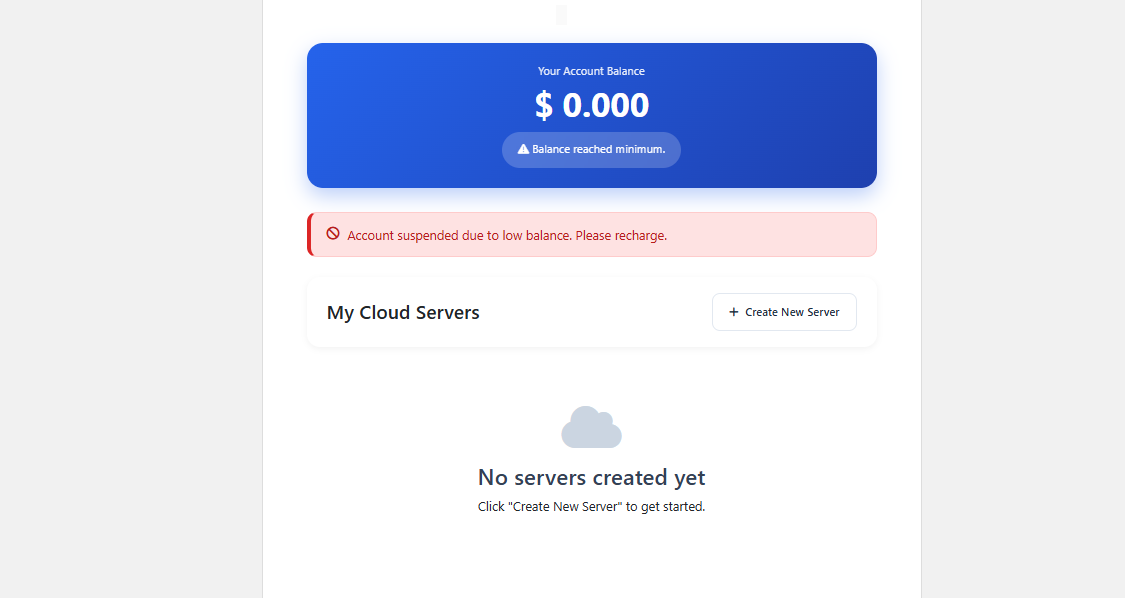
Client Area:
In the image below, you see the client area where the insufficient credit error is displayed on the client panel. After the customer recharges their account, this error is disabled
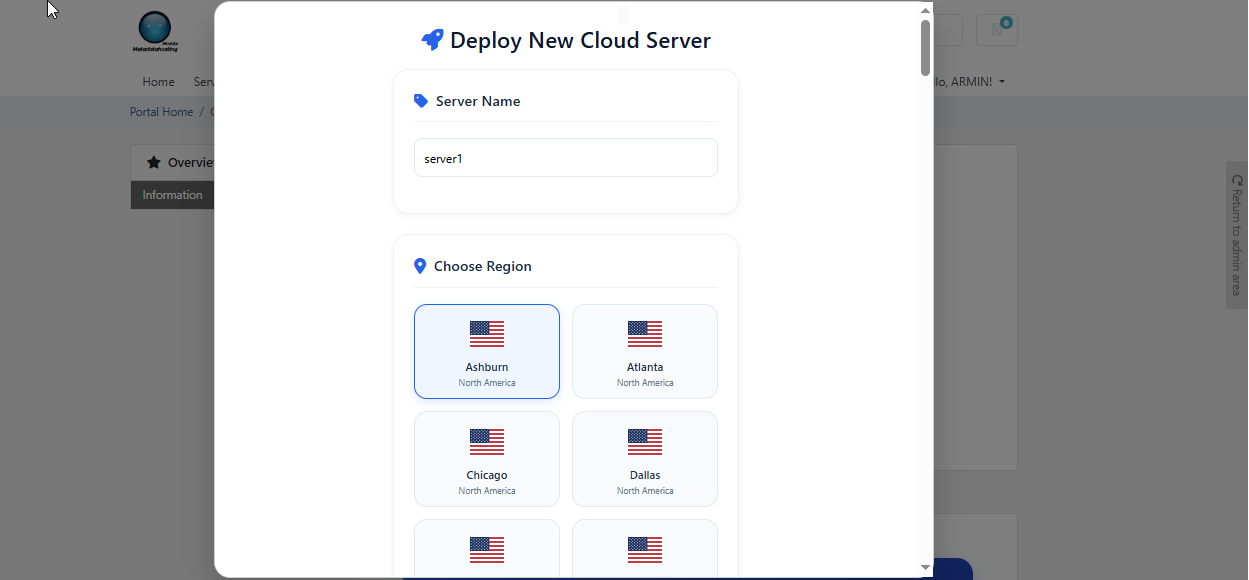
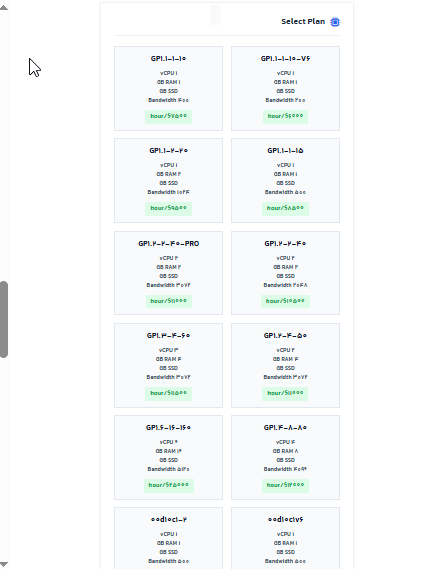
After recharging the account and clicking the 'create new server' option, the 'Deploy New Cloud Server' page appears, where you can select locations and plans (on each plan, the server specifications including RAM, CPU, disk, and bandwidth are specified) and create your desired service.
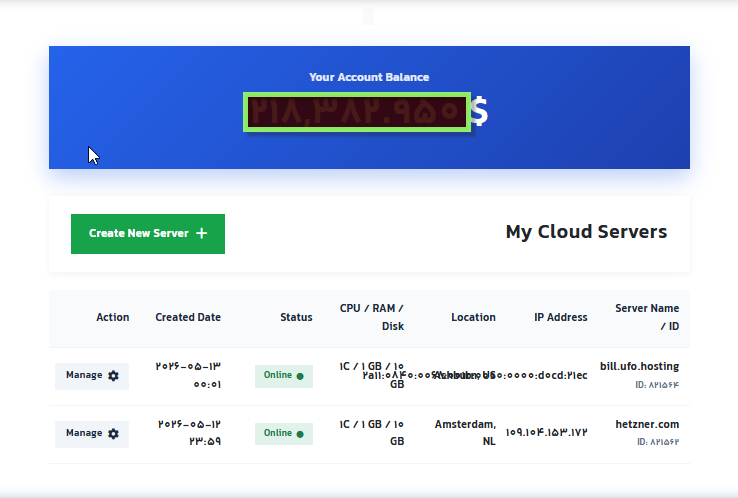
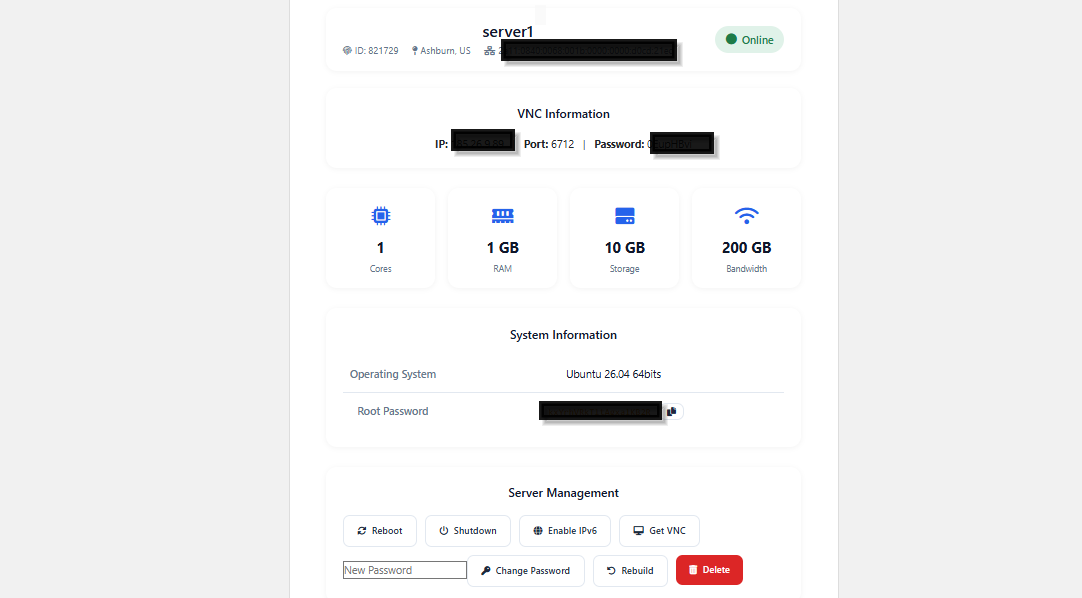
The server management section in the client area includes various tools such as reboot, password change, rebuild, IPv6 activation, server deletion, server shutdown, viewing VNC details, as well as displaying the amount of bandwidth used and server specifications